Vue normale

Reçu avant avant-hierIt's FOSS

Tap into Potential: Add Premium Touch to Your Raspberry Pi Projects With SunFounder's 10-inch Display
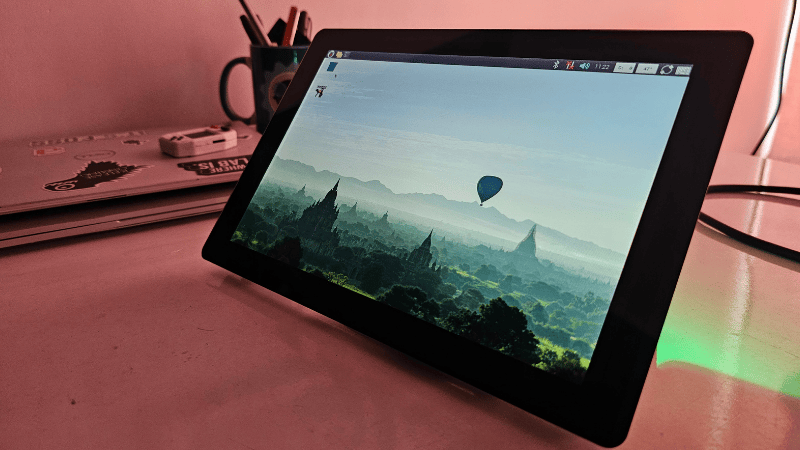
7 mai 2025 à 09:58
Tap into Potential: Add Premium Touch to Your Raspberry Pi Projects With SunFounder's 10-inch Display

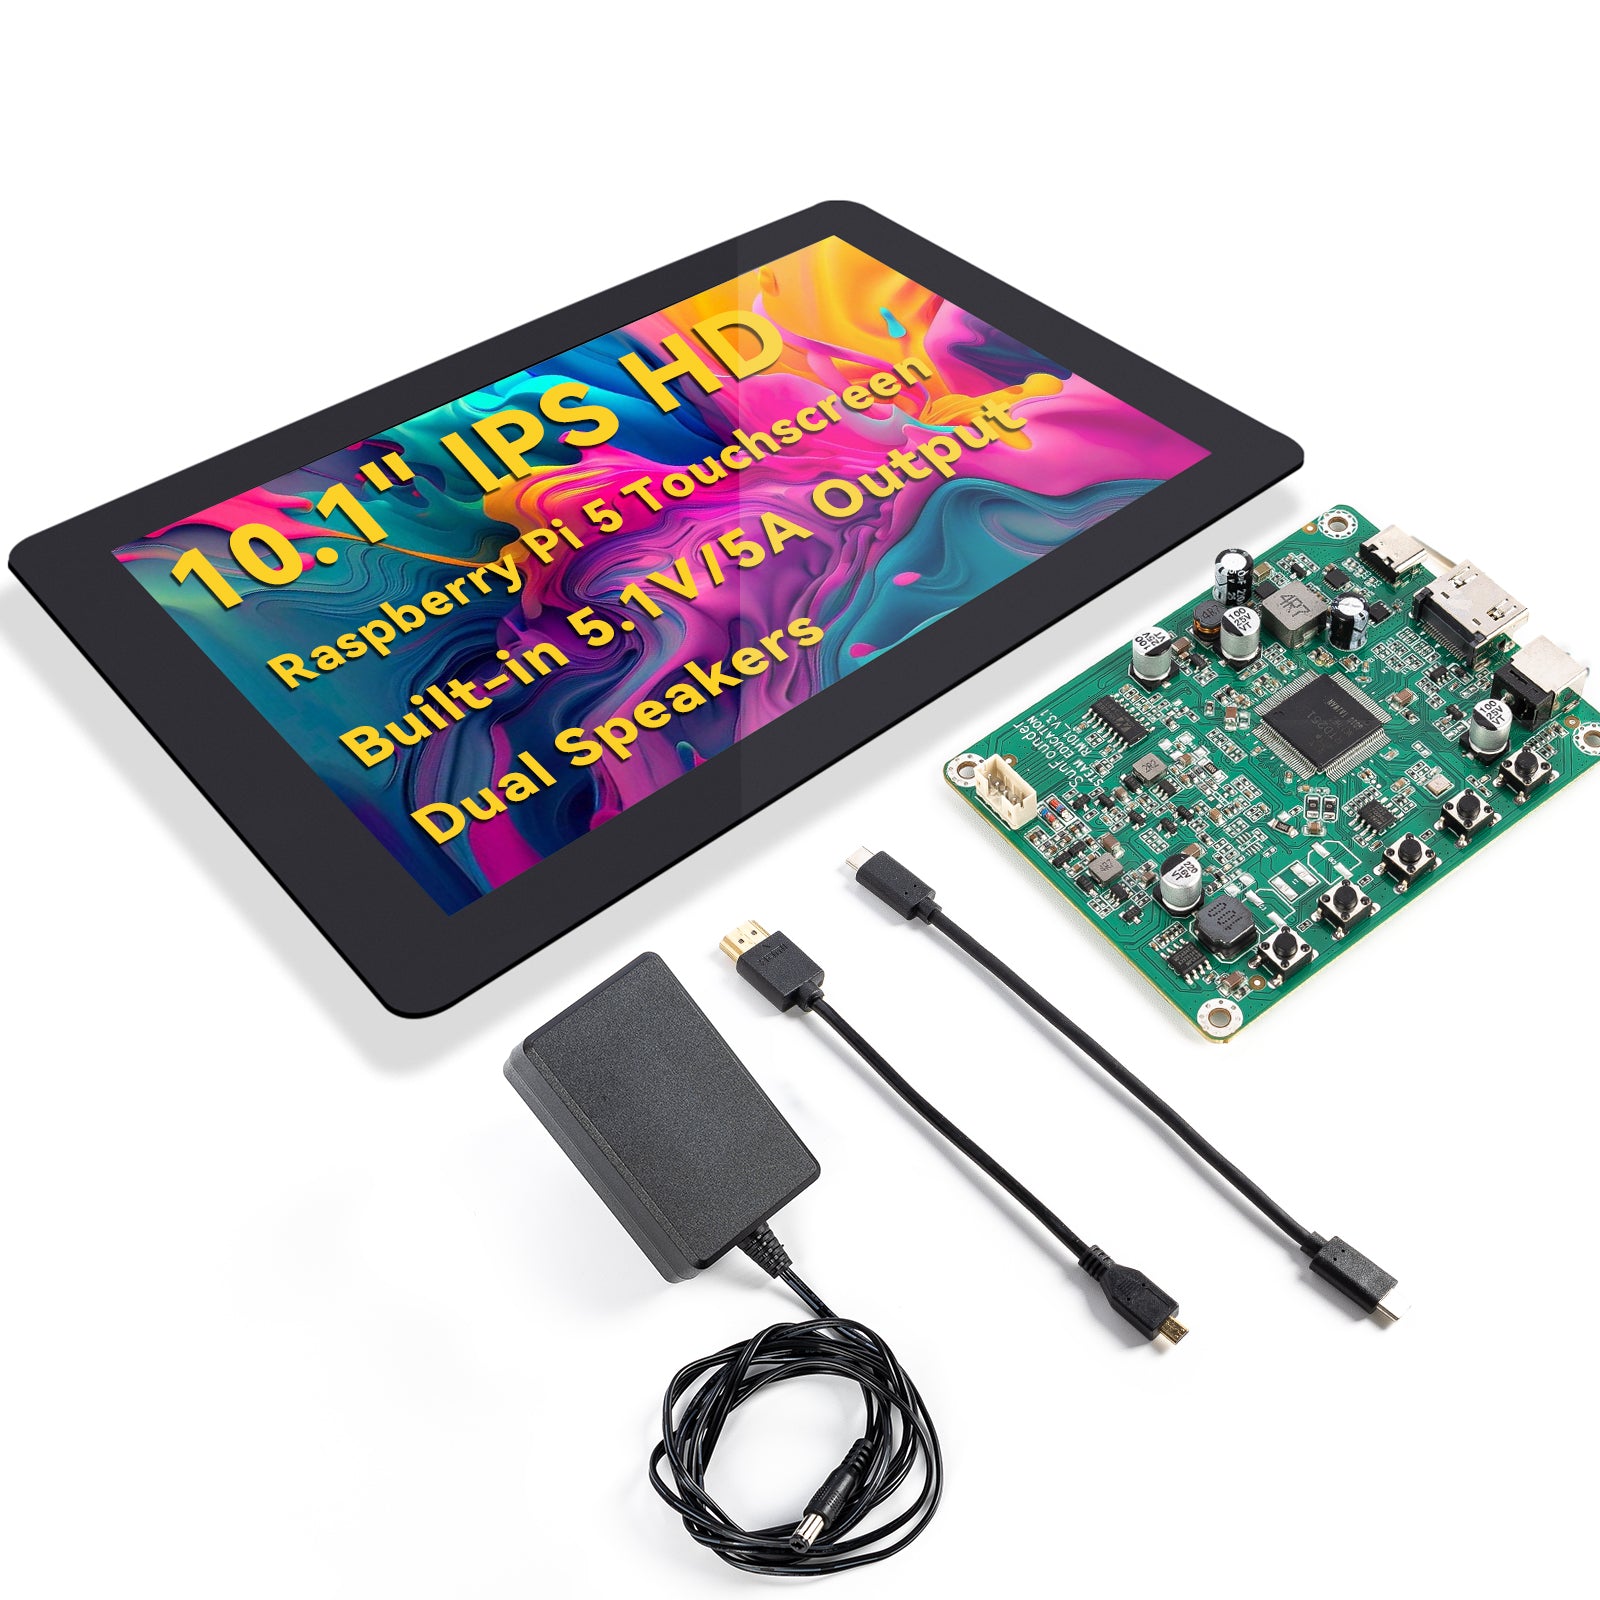
I have got my hands on this 10 inches touchscreen from SunFounder that is made for Raspberry Pi like devices.

If you are considering adding touch capability to your Raspberry Pi project, this could be a good contender for that.

I have used a few SunFounder products in the past but the Pironman case made me their fan. And I truly mean that. This is why before I opened the package, I had a feeling that this will be a solid device.

Let me share my experience with SunFounder's 10 inch DIY Touch Screen with you.

SunFounder Latest 10 Inch DIY Touch Screen All-In-One Solution for Raspberry Pi 5, IPS HD 1280x800 LCD, Built-In USB-C PD 5.1V/5A Output, HDMI, 10-point, No Driver, Speakers, for RPi 5/4/3/Zero 2W
This SunFounder Touch Screen is a 10-point IPS touch screen in a 10.1″ big size and with a high resolution of 1280x800, bringing you perfect visual experience. It works with various operating systems including Raspberry Pi OS, Ubuntu, Ubuntu Mate, Windows, Android, and Chrome OS.
Tap into Potential: Add Premium Touch to Your Raspberry Pi Projects With SunFounder's 10-inch DisplaySunFounderSunFounder
Tap into Potential: Add Premium Touch to Your Raspberry Pi Projects With SunFounder's 10-inch Display
📜
TL;DR

It is a well-thought device that gives a smooth touch experience. A single power cord runs both the screen and Pi. The on-board speakers give you more than just display although they are very basic.

All the interface remain available. The best thing is that it can be used with several other SBCs too.

From 3D printing to cyberdeck to home automation, how you use it is up to you.

The $149.99 price tag is decent for the quality of the touchscreen and the out of box experience it provides for the Raspberry Pi OS.

Technical specifications

Before we get into the nitty-gritty of performance, let's look at what you're actually getting with this display:

Specification Details
Screen Size 10 inches (diagonal)
Resolution 1280 x 800 pixels
Panel Type IPS (In-Plane Switching)
Touch Technology Capacitive multi-touch (up to 10 points)
Connection HDMI for display, USB for touch function
Compatible with Raspberry Pi 4B, 3B+, 3B, 2B, Zero W
Power Supply DC 12V/5A power supply with built-In USB-C PD
Audio 2 speakers
Dimensions 236mm x 167mm x 20mm
Viewing Angle 178° (horizontal and vertical)
Weight Approximately 350g

Assembling

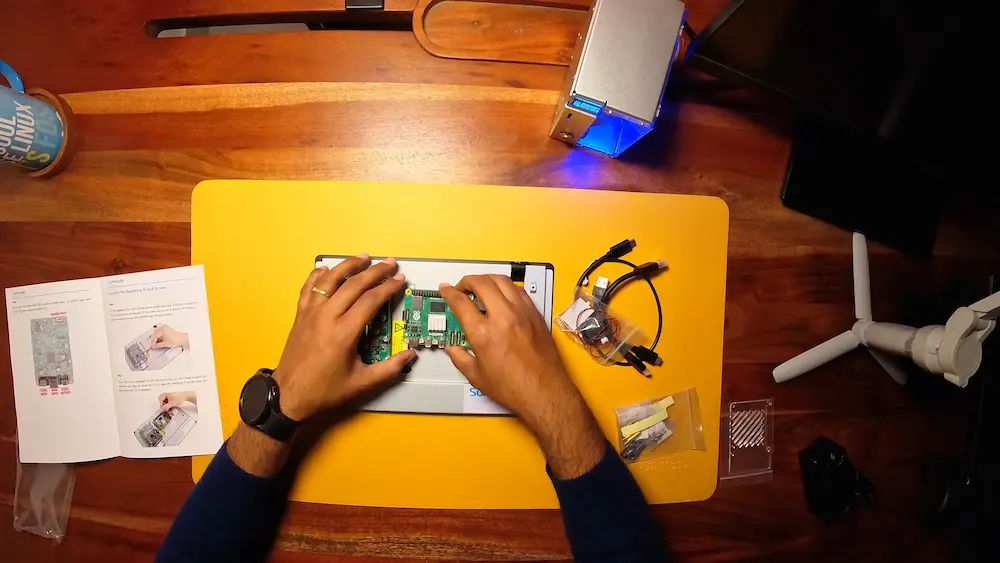
SunFounder has a thing for assembling. Like most of their other products, the touchscreen also needs some assembling. After all, it is properly called 'a 10 -inch DIY touchscreen' so there is obviously a DIY angle here.

The assembling should not take you more than 10–15 minutes to put all the pieces together.
Tap into Potential: Add Premium Touch to Your Raspberry Pi Projects With SunFounder's 10-inch Display

The assembly basically requires attaching the single board computer with the screws, taping the speakers and connecting it to the touchscreen cable.

It's actually fun to do the assembly. Not everyone will be a fan of this but I am guessing if you are into maker's electronics, you won't be unhappy with the assembly requirement.

Experiencing SunFounder DIY Touchscreen

The device is powered by a 12V/5A DC power that also powers the Raspberry Pi with 5.1V/5A. There are LED lights at the back that indicate if the Pi is turned on or not.

There is no on-board battery, in case you were wondering about that. It needs to be connected to the power supply all the time to function. Although, if you need, you can always attach a battery-powered system to it.

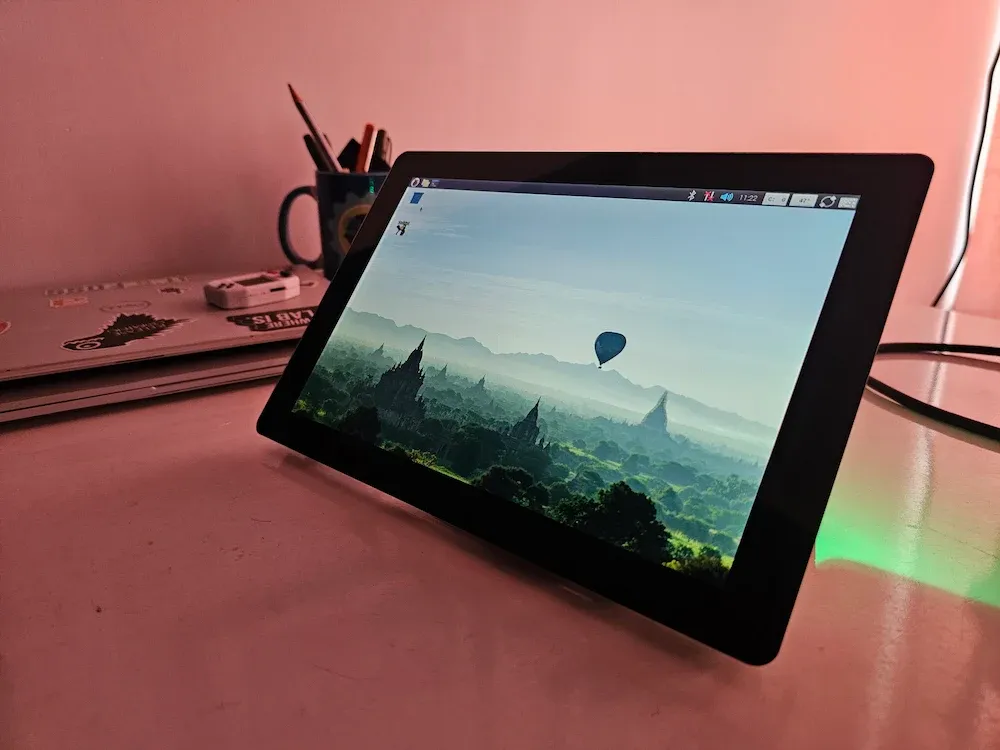
The display is IPS and the surface feels quite premium. Some people may find it a bit glossy and slippery but the IPS screens have the same look and feel in my experience.

Colors are vibrant, text is crisp, and the IPS panel means viewing angles are excellent.
Tap into Potential: Add Premium Touch to Your Raspberry Pi Projects With SunFounder's 10-inch Display

The 10 point capacitive touch works out of the box. The touch response is quite good. I noticed that the double-click mouse action actually needs 3 quick taps. It took me some time to understand that it is the intended behavior.

My 4-years old daughter used it for playing a few games on GCompris and that worked very well. Actually, she sees the Raspberry Pi wallpaper and thinks it's her computer. I had to take the device off her hands as I didn't want her to use it as a tablet. I would prefer that she keeps on using a keyboard and mouse with her Pi.

On-screen keyboard

SunFounder claims that no drivers are required and the touchscreen is ready to be plugged in and play if you use Raspbian OS.

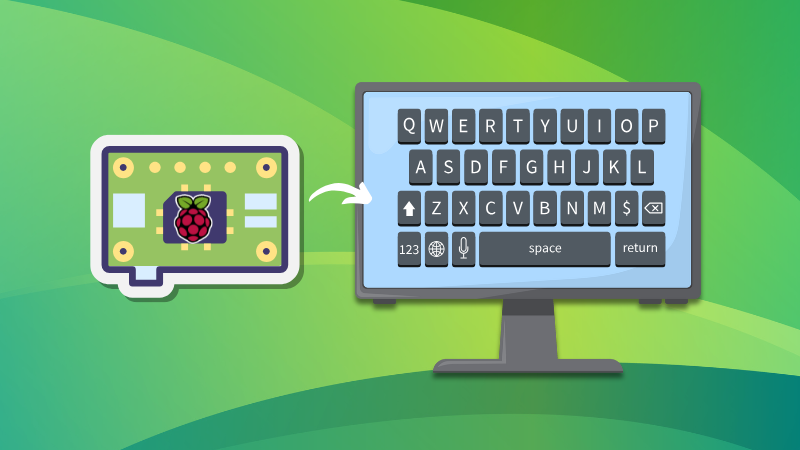
While I didn't have to install any drivers, and the touchscreen worked fine, I had to install squeekboard package to activate the on-screen keyboard on my Raspberry Pi 5 with Raspbian OS.

The official SunFounder document mentions that this package should be preinstalled in Raspbian OS but that was not the case for me. Not a major issue as the on-screen keyboard worked fine too after installing the missing package.

Using On-screen Keyboard in Raspberry Pi OS
Here’s what you can do to use a virtual keyboard on Raspberry Pi OS.
Tap into Potential: Add Premium Touch to Your Raspberry Pi Projects With SunFounder's 10-inch DisplayIt's FOSSAbhishek Prakash
Tap into Potential: Add Premium Touch to Your Raspberry Pi Projects With SunFounder's 10-inch Display

Speakers

Before I forget, I should mention that the touchscreen also has two tiny speakers at the bottom. They are good enough for occasional cases where you need audio output. You won't need to plugin a headphone or external speakers in such cases.

But if you want anything more than that, you'll need to attach proper speakers. It really depends on what you need it for.

Dude, where is my stand?

It would have been nice to have some sort of stand with the screen. That would make it easier to use the touchscreen as a monitor on the table.

At first glance, it seems like it is more suitable as a wall mount to display your homelab dashboard or some other information.

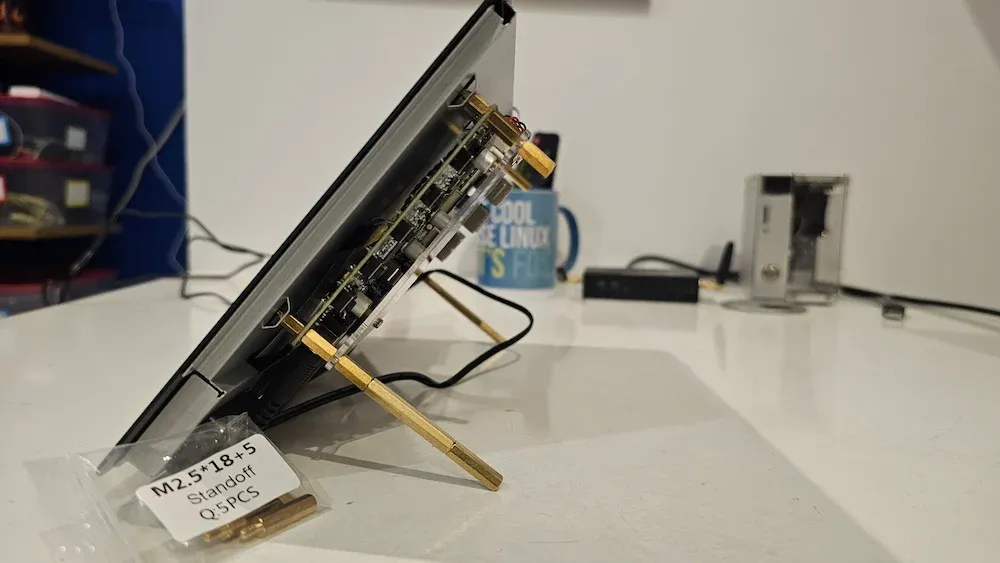
But it's not completely impossible to use it without a dedicated stand on the desk. I used the extra M 2.5 screws to increase the length of the bottom two screws. That gave it a stand like appearance.
Tap into Potential: Add Premium Touch to Your Raspberry Pi Projects With SunFounder's 10-inch Display
Little tweak to make a stand with extra screws

I thought I was smart to utilize those extra screws as a stand. Later I found out that it was intended for that purpose, as the official document also mentioned this trick.

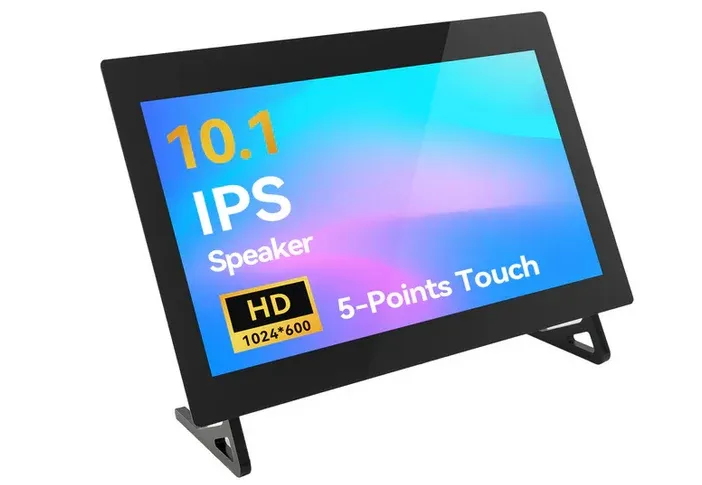
I remember the older model of this touch screen used to have a dedicated stand.
Tap into Potential: Add Premium Touch to Your Raspberry Pi Projects With SunFounder's 10-inch Display
Older model of SunFounder's Touchscreen had a dedicated stand

I still think that dedicated stand attachments would have been a better idea.

By the way, if you want and have the resources, you can 3D print a custom case for the touchscreen. SunFounder provides the 3D Printer File and all necessary steps on its documentation website.

What can you use it for?

The imagination is your limit. There are no dearths of touch-focused Raspberry Pi projects.

Here are a few usages I can think of:

  • Cyberdeck setup
  • Smart home dashboard
  • Retro gaming setup
  • Use in 3d printers
  • Robotics control interface
  • In-car entertainment system (I mean, why not, if you have an ancient car and want to do some tinkering)
  • Mini kiosk for small businesses
  • Homelab dashboard display
  • Weather station and agenda display
  • Digital photo frame

Should you get it?

The answer always depends on what you need and what you want.

If you are on the lookout for a new touchscreen for your homelab or DIY projects, this is definitely worth a look.

Sure, the price tag is more than the official Raspberry Pi touchscreen but SunFounder's touchscreen has better quality (IPS), is bigger with better resolution, has speakers and supports more SBCs.

Basically, it is a premium device, whereas most touchscreen available on lower prices have a very toy-ish feel.

If affordability is not a concern and you need excellent touch experience for your projects, I can surely recommend this product.
Enable or Disable Word Wrap in VS Code

7 mai 2025 à 13:06
Enable or Disable Word Wrap in VS Code

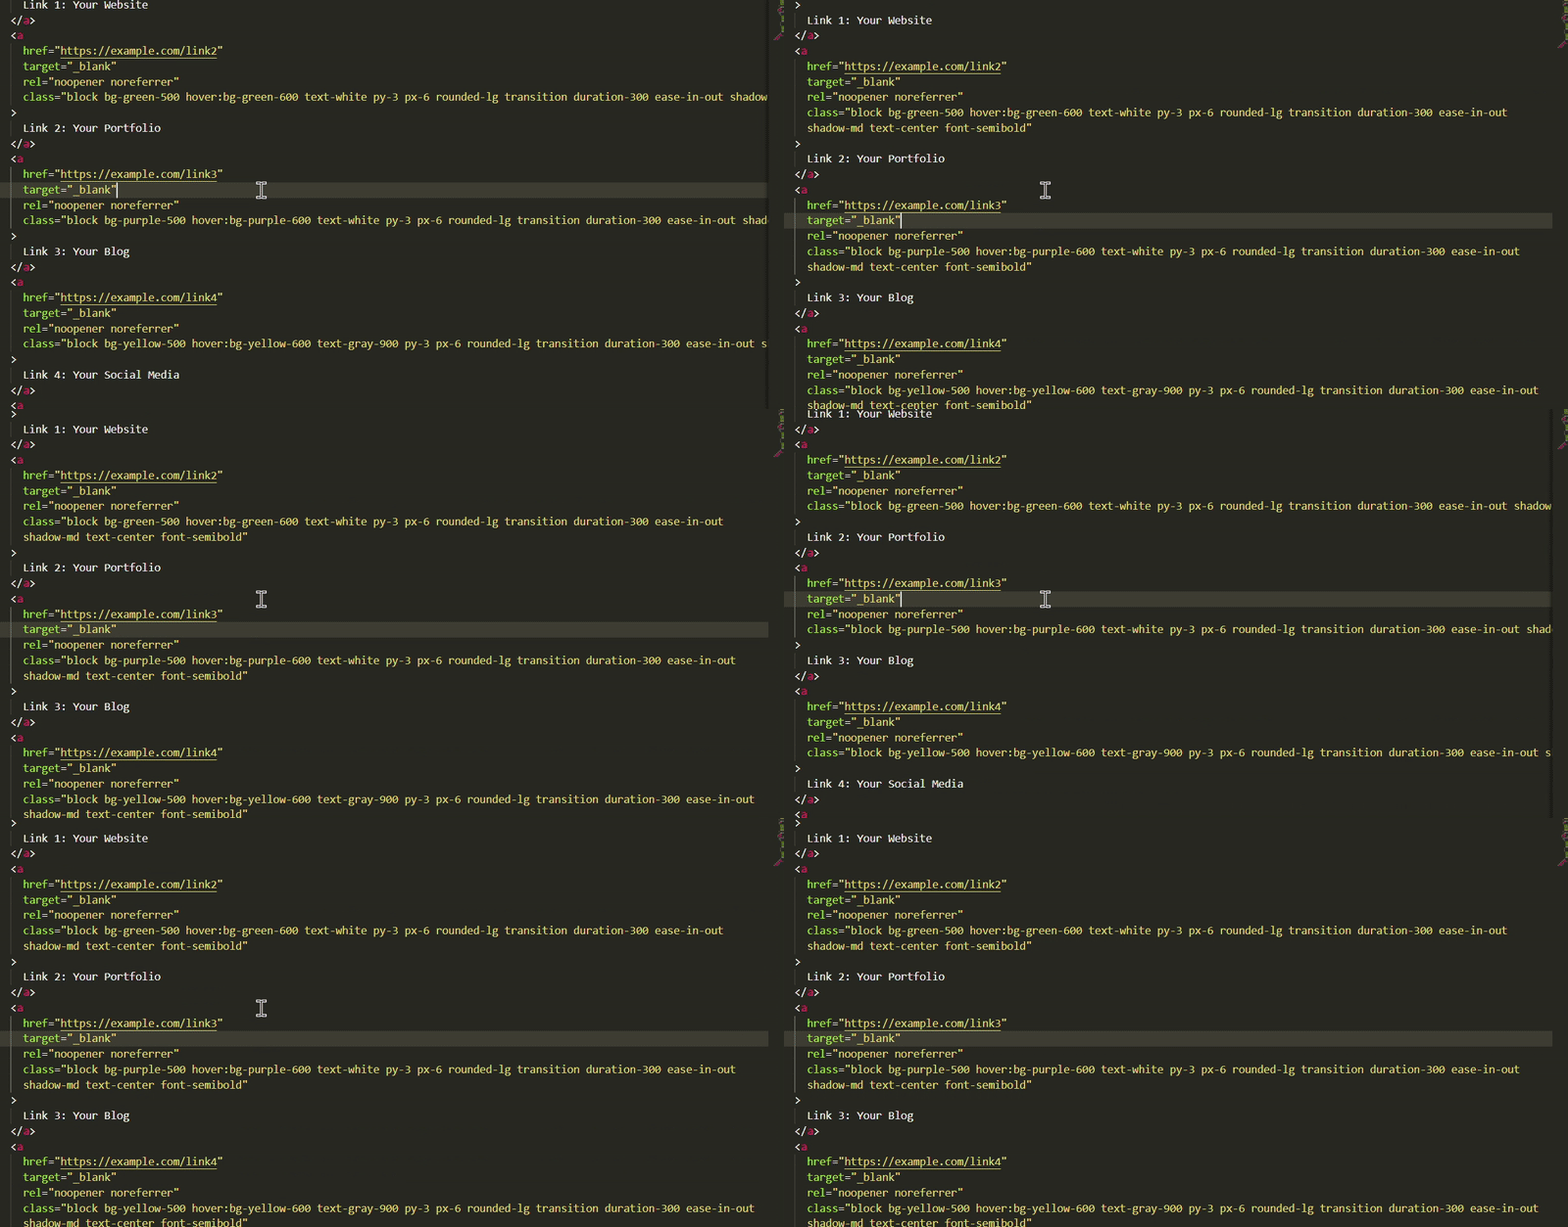
Word wrap automatically breaks a long line of text so it fits within your current editor window, without you needing to scroll horizontally. It doesn’t add line breaks to your file; it just wraps it visually.

Picture this: You’re writing a long JavaScript function or a long SQL query. Without word wrap, you’d be endlessly dragging that horizontal scrollbar. With it, everything folds neatly within view.

This is especially useful when:

  • You're working on a small screen.
  • You want cleaner screenshots of your code.
  • You prefer not to lose track of long lines.

Now, let's see how to turn it on or off when needed.

Method 1: The quickest toggle - Alt + Z

Yep, there’s a shortcut for it!

  1. Open any file in VS Code.
  2. Press Alt + Z on your keyboard.
Enable or Disable Word Wrap in VS Code

And that’s it! Word wrap is toggled. Hit it again to switch it off.

Method 2: Use the command palette

Prefer something a bit more visual? The Command Palette is your go-to.

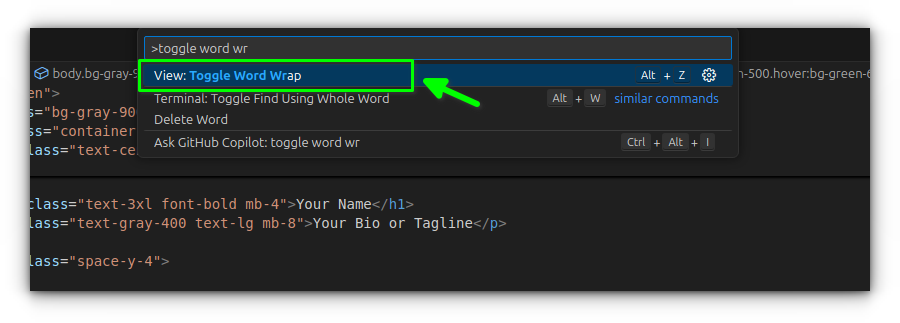
  1. Press Ctrl + Shift + P (or Cmd + Shift + P on macOS).
  2. Type Toggle Word Wrap.
  3. Click the option when it appears.
Enable or Disable Word Wrap in VS Code

This is ideal if you’re not sure of the shortcut or just want to double-check before toggling.

Method 3: Set a default from settings

Want word wrap always on (or always off) when you open VS Code? You can change the default behavior.

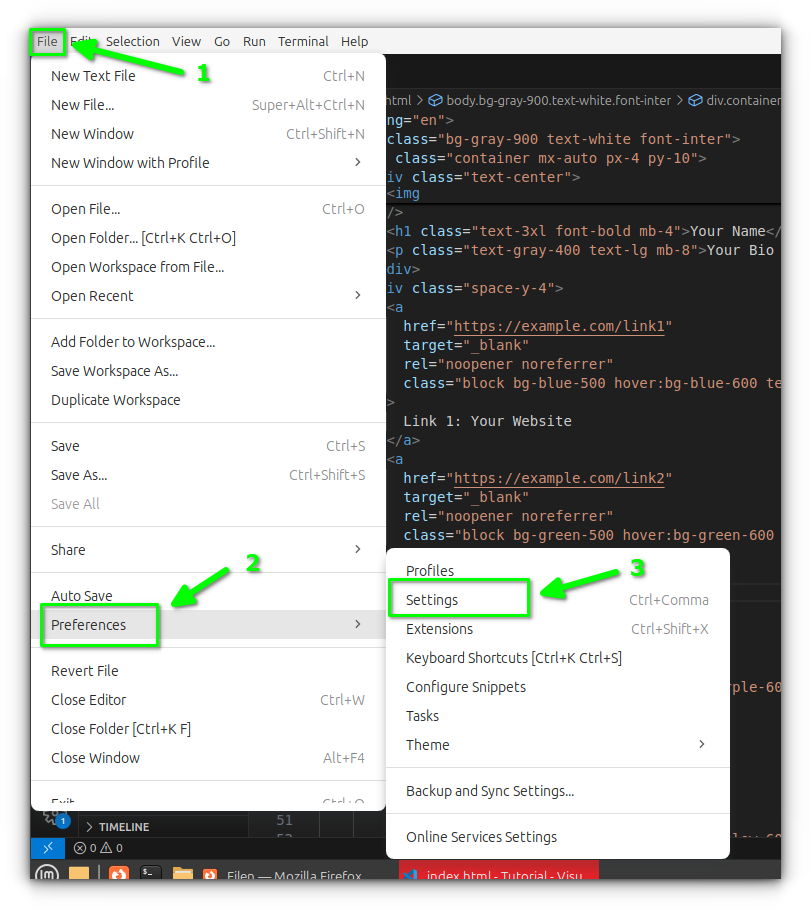
1. Go to File > Preferences > Settings

Enable or Disable Word Wrap in VS Code

2. Search for “word wrap.”

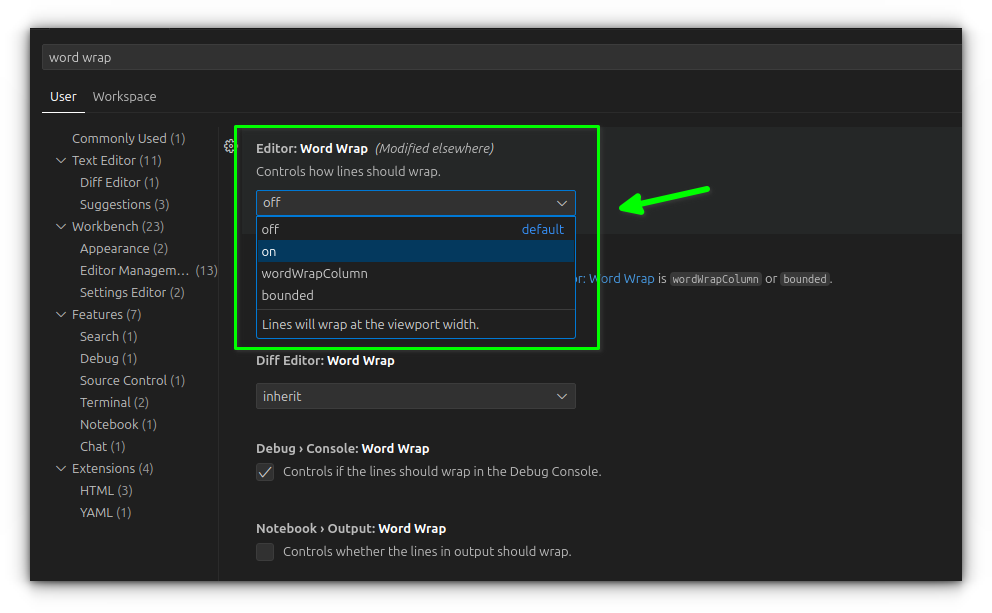
3. Under Editor: Word Wrap, choose from the following options:

    • off: Never wrap.
    • on: Always wrap.
    • wordWrapColumn: Wrap at a specific column number.
    • bounded: Wrap at viewport or column, whichever is smaller.
    Enable or Disable Word Wrap in VS Code
    💡
    What’s “wordWrapColumn” anyway?
    It lets you define a column (like 20) at which VS Code should wrap lines. Great for keeping things tidy in teams with coding standards.

    You can also tweak "editor.wordWrap" in settings.json if you prefer working directly with config files.

    Wrapping up!

    Word wrap might seem like a tiny detail, but it’s one of those “small things” that can make coding a lot more pleasant. Take the indentation settings for example, another crucial piece for code readability and collaboration. Yes, the tabs vs spaces debate lives on 😄

    We’ll continue exploring more quick yet powerful tips to help you make the most of VS Code.

    Until then, go ahead and wrap those words your way.

    FOSS Weekly #25.19: sudo-rs, Terminal Makeover, Kazam 2.0, Mission Center and More Linux Stuff

    8 mai 2025 à 07:54
    FOSS Weekly #25.19: sudo-rs, Terminal Makeover, Kazam 2.0, Mission Center and More Linux Stuff

    Rust everywhere! It was included in the Linux kernel code a couple of years ago. And even before that happened, a race started to re-write tools into Rust.

    14 Rust Tools for Linux Terminal Dwellers
    Rust-powered tools for the terminal? Here are some of the best options as alternatives to some popular command-line tools!
    FOSS Weekly #25.19: sudo-rs, Terminal Makeover, Kazam 2.0, Mission Center and More Linux StuffIt's FOSSSreenath
    FOSS Weekly #25.19: sudo-rs, Terminal Makeover, Kazam 2.0, Mission Center and More Linux Stuff

    And now it seems that Ubuntu is relying heavily on Rust re-implementations. In the upcoming Ubuntu 25.10, you'll see GNU Coreutils replaced with Rust-based uutils. The classic sudo command will also be replaced by Rust-based sudo-rs.

    Ubuntu 25.10 is Switching to Rust-based Sudo
    The upcoming Ubuntu release will use sudo-rs instead of sudo.
    FOSS Weekly #25.19: sudo-rs, Terminal Makeover, Kazam 2.0, Mission Center and More Linux StuffIt's FOSS NewsSourav Rudra
    FOSS Weekly #25.19: sudo-rs, Terminal Makeover, Kazam 2.0, Mission Center and More Linux Stuff

    Too much of Rust? What do you think?

    💬 Let's see what else you get in this edition

    • Curl saying no to AI slop.
    • Redis returning to its open source roots.
    • Detailed terminal customization video
    • KDE being done with Plasma LTS releases.
    • And other Linux news, tips, and, of course, memes!
    • This edition of FOSS Weekly is supported by AWS Valkey.

    ❇️ Scale Your Real-Time Apps with Amazon ElastiCache Serverless for Valkey

    What’s Valkey? Valkey is the most permissive open source alternative to Redis stewarded by the Linux Foundation, which means it will always be open source.

    What’s Amazon ElastiCache Serverless for Valkey? It’s a serverless, fully managed caching service delivering microsecond latency performance at 33% lower cost than other supported engines.

    Even better, you can upgrade from ElastiCache for Redis OSS to ElastiCache for Valkey with zero downtime.

    Don’t just take our word for it – customers are already seeing improvements in speed, responsiveness, and cost.

    Try Amazon ElastiCache for Valkey and feel the difference.

    Valkey-, Memcached-, and Redis OSS-Compatible Cache - Amazon ElastiCache Customers - AWS
    Learn how customers are using Amazon ElastiCache for for their caching needs.
    FOSS Weekly #25.19: sudo-rs, Terminal Makeover, Kazam 2.0, Mission Center and More Linux StuffAmazon Web Services, Inc.
    FOSS Weekly #25.19: sudo-rs, Terminal Makeover, Kazam 2.0, Mission Center and More Linux Stuff

    📰 Linux and Open Source News

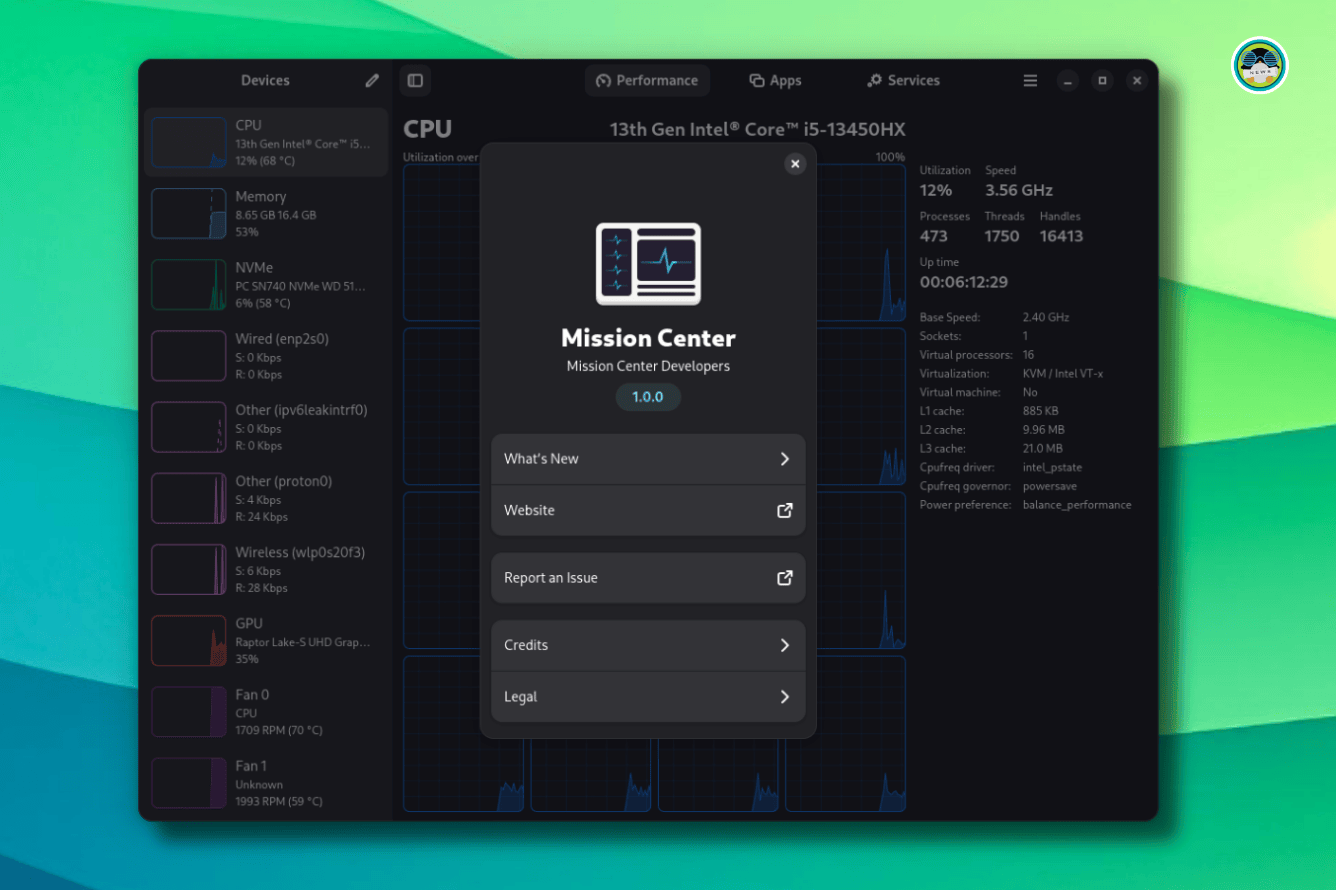
    Mission Center 1.0 is a release packed with many nice changes.

    Mission Center Hits A 1.0 Release! Making it the Best GUI System Monitor for Linux
    Mission Center 1.0 is here with a refined interface and many cool features.
    FOSS Weekly #25.19: sudo-rs, Terminal Makeover, Kazam 2.0, Mission Center and More Linux StuffIt's FOSS NewsSourav Rudra
    FOSS Weekly #25.19: sudo-rs, Terminal Makeover, Kazam 2.0, Mission Center and More Linux Stuff

    🧠 What We’re Thinking About

    AI slop doesn't look like it will stop any time soon, but curl has put a stop to it in its bug bounty program.

    Curl is Done With AI Slop
    The curl project is cracking down on low-quality AI-generated bug reports.
    FOSS Weekly #25.19: sudo-rs, Terminal Makeover, Kazam 2.0, Mission Center and More Linux StuffIt's FOSS NewsSourav Rudra
    FOSS Weekly #25.19: sudo-rs, Terminal Makeover, Kazam 2.0, Mission Center and More Linux Stuff

    🧮 Linux Tips, Tutorials and More

    I have always considered Kazam to be the best screen recorder for Linux. For the past several years, it didn't see any development. But finally, there is Kazam 2.0 with newer features now.

    Record Screen in Ubuntu Linux With Kazam [Beginner’s Guide]
    This tutorial shows you how to install Kazam screen recorder and explains how to record the screen in Ubuntu. The guide also lists useful shortcuts and handy tips for using Kazam.
    FOSS Weekly #25.19: sudo-rs, Terminal Makeover, Kazam 2.0, Mission Center and More Linux StuffIt's FOSSAbhishek Prakash
    FOSS Weekly #25.19: sudo-rs, Terminal Makeover, Kazam 2.0, Mission Center and More Linux Stuff

    Why should you opt for It's FOSS Plus membership:

    ✅ Ad-free reading experience
    ✅ Badges in the comment section and forum
    ✅ Supporting creation of educational Linux materials

    Join It's FOSS Plus

    👷 Homelab and Maker's Corner

    I review SunFounder's 10-inch DIY touch screen display.

    SunFounder Touchscreen review: Add a Premium Touch to Your SBC
    Transform your Raspberry Pi into a versatile interactive device with SunFounder’s 10-inch touchscreen. Here’s my experience with this device.
    FOSS Weekly #25.19: sudo-rs, Terminal Makeover, Kazam 2.0, Mission Center and More Linux StuffIt's FOSSAbhishek Prakash
    FOSS Weekly #25.19: sudo-rs, Terminal Makeover, Kazam 2.0, Mission Center and More Linux Stuff

    🎟️ Free Webinar | How SOC Teams Save Time with ANY.RUN: Action Plan

    Trusted by 15,000+ organizations, ANY.RUN knows how to solve SOC challenges. Join team leads, managers, and security pros to learn expert methods on how to:  

    • Increase detection of complex attacks  
    • Speed up alert & incident response  
    • Improve training & team coordination  

    ✨ Apps Highlight

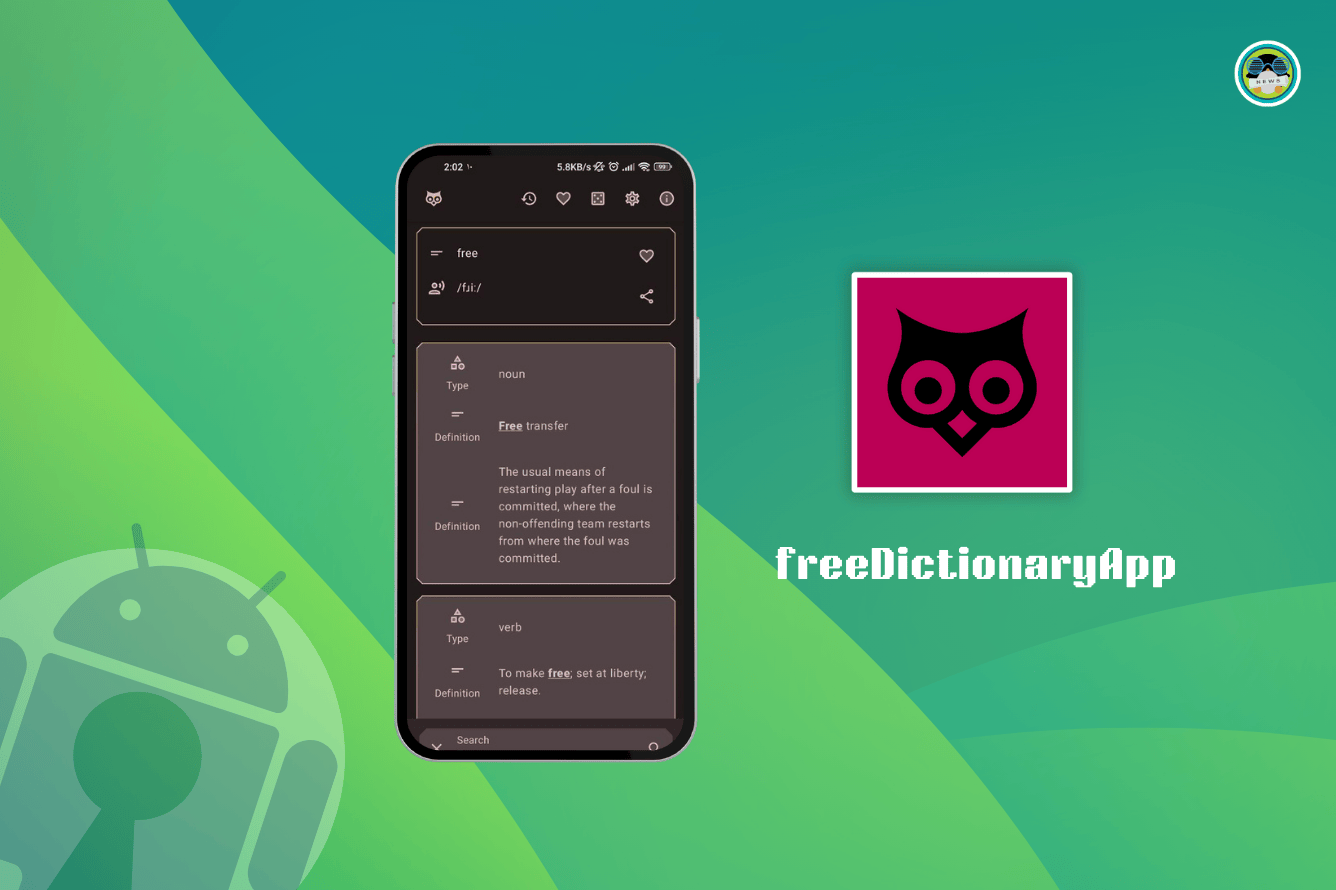
    Don't get lost in words, install this open source dictionary app to always have a dependable resource at hand.

    freeDictionaryApp: Open Source Android App That Helps You Get Information on a Word
    An easy way to get additional information about a word!
    FOSS Weekly #25.19: sudo-rs, Terminal Makeover, Kazam 2.0, Mission Center and More Linux StuffIt's FOSS NewsSourav Rudra
    FOSS Weekly #25.19: sudo-rs, Terminal Makeover, Kazam 2.0, Mission Center and More Linux Stuff

    📽️ Videos I am Creating for You

    A step-by-step video tutorial to transform your functional but boring terminal into an eye candy with additional features.

    🧩 Quiz Time

    Can you correctly Guess the Linux apps in this crossword?

    Guess the Linux Apps: Crossword
    You have seen them around you and perhaps used them all, too. Can you solve this crossword by correctly guessing the Linux software?
    FOSS Weekly #25.19: sudo-rs, Terminal Makeover, Kazam 2.0, Mission Center and More Linux StuffIt's FOSSAbhishek Prakash
    FOSS Weekly #25.19: sudo-rs, Terminal Makeover, Kazam 2.0, Mission Center and More Linux Stuff

    💡 Quick Handy Tip

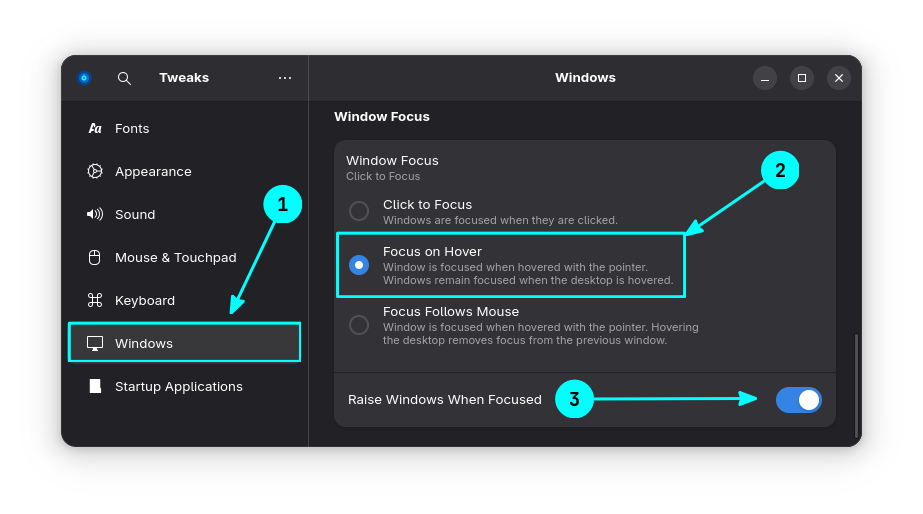
    With GNOME Tweaks, you can set app window focus from "Click to Focus" to "Focus on Hover". For doing that, open GNOME Tweaks and go into the Windows tab. Here, under Window Focus, click on "Focus on Hover". Now, enable the "Raise Windows When Focused" toggle button.

    FOSS Weekly #25.19: sudo-rs, Terminal Makeover, Kazam 2.0, Mission Center and More Linux Stuff

    With this, whenever you hover over another window, it will be automatically focused. The window won't lose focus when the cursor is on the desktop. To revert to stock behavior, click on the "Click to Focus" option.

    🤣 Meme of the Week

    The list never ends! 🥲

    FOSS Weekly #25.19: sudo-rs, Terminal Makeover, Kazam 2.0, Mission Center and More Linux Stuff

    🗓️ Tech Trivia

    After Commodore declared bankruptcy in 1994, German company Escom AG bought its name and tech for $10 million, aiming to revive the iconic Amiga, but eventually sold the rights instead.

    🧑‍🤝‍🧑 FOSSverse Corner

    Regular FOSSer Rosika has created a file management script for Android and Linux.

    File management script for Android and Linux
    Hi all, 👋 I don´t know whether the following would be of any interest to any of you but I thought I´d post it here anyway. 😊 Often enough there´s a situation in which I find myself obliged to scan physical documents (i.e. documents on paper) in order to produce a digital equivalent of them. In most cases I need to have them in digital format for being able to quickly and easily access them e.g. when dealing my income tax return. Anyhow, due the setup of my computer peripherals it´s…
    FOSS Weekly #25.19: sudo-rs, Terminal Makeover, Kazam 2.0, Mission Center and More Linux StuffIt's FOSS CommunityRosika
    FOSS Weekly #25.19: sudo-rs, Terminal Makeover, Kazam 2.0, Mission Center and More Linux Stuff

    ❤️ With love

    Share it with your Linux-using friends and encourage them to subscribe (hint: it's here).

    Share the articles in Linux Subreddits and community forums.

    Follow us on Google News and stay updated in your News feed.

    Opt for It's FOSS Plus membership and support us 🙏

    Enjoy FOSS 😄

    Reçu aujourd’hui — 10 mai 2025It's FOSS

    How I Turned My Old Hi-Fi Speakers into Bluetooth Ones with Raspberry Pi

    10 mai 2025 à 08:49
    How I Turned My Old Hi-Fi Speakers into Bluetooth Ones with Raspberry Pi

    Sometimes I do weird things for the sake of it. Like once, I used Raspberry Pi as a WiFi extender for fun. This is one of those stories.

    I had an old pair of hi-fi speakers gathering dust in a forgotten corner of the house.

    The only problem? They needed a Bluetooth dongle and DAC to work, and I didn’t have either. But with my love for DIY and a determination to salvage my musical aspirations, I decided to take a different route.

    I thought of giving my old speakers a new life by if converting them into Bluetooth speakers. In this article, I’ll take you through my journey of reviving these old speakers.

    From putting together a DAC, connecting both speakers, and grappling with my first soldering iron (spoiler: it wasn’t pretty), to finally using my old Raspberry Pi 3 as the brains behind a fully functional Bluetooth speaker system.

    It wasn’t perfect, but the experience taught me a lot and gave me a setup that delivers impressive sound without spending a fortune.

    Let’s dive into the details!

    What I used

    I gathered a mix of new and existing components. Here’s everything I used for this project:

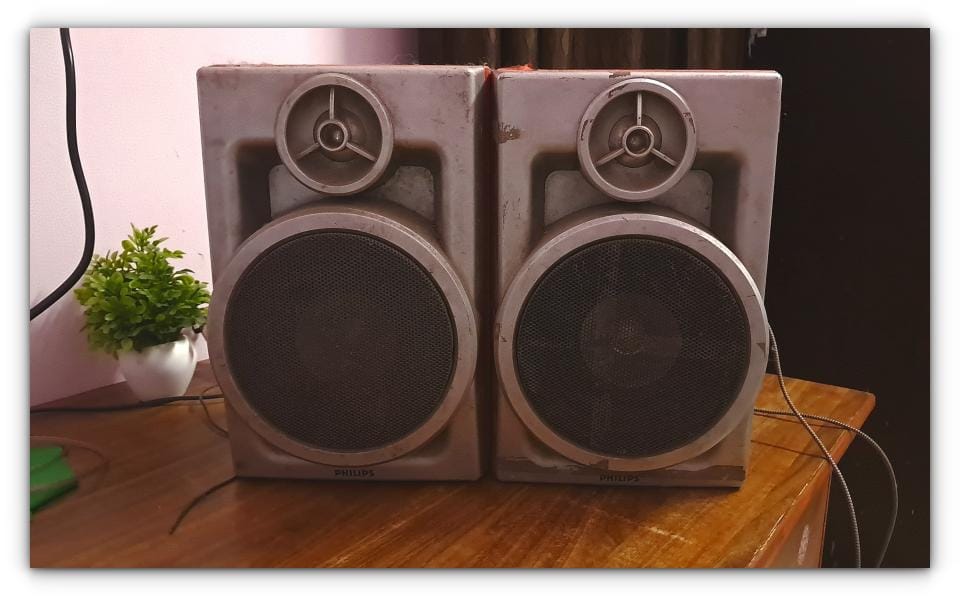
    Two Hi-Fi Speakers: These were the stars of the show— old obviously that had been lying unused for years. Their sound potential was too good to ignore, and this project was all about giving them a second chance.

    How I Turned My Old Hi-Fi Speakers into Bluetooth Ones with Raspberry Pi
    Yep, I forgot to clean the speakers before capturing this picture

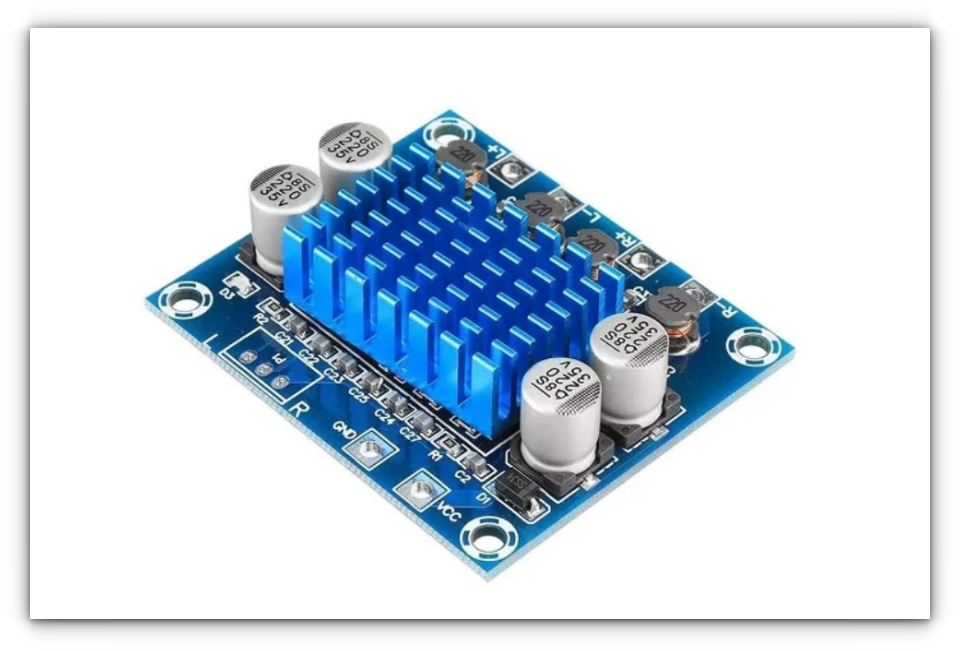
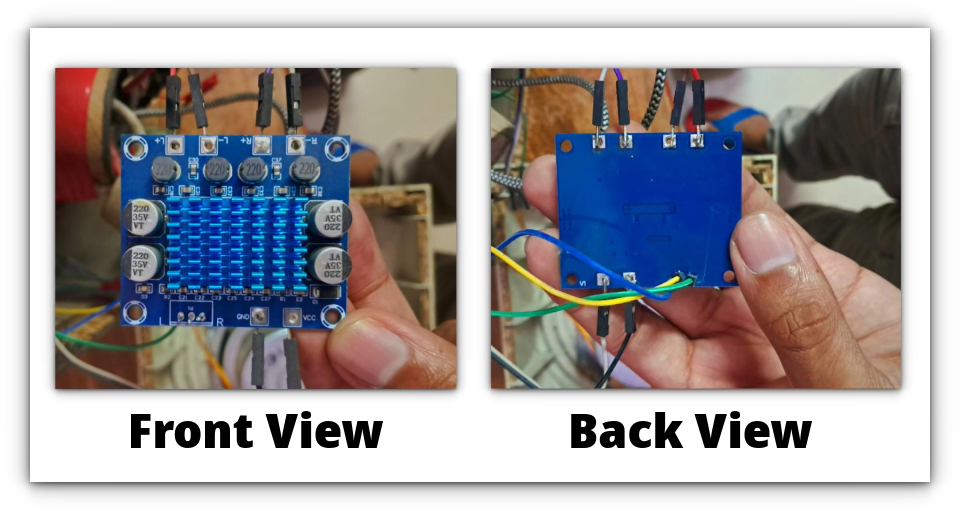
    DAC Chipset: A Digital-to-Analog Converter (DAC) was essential to drive the speakers. I used a basic DAC module that supported input from a 3.5mm jack and output for the speakers.

    How I Turned My Old Hi-Fi Speakers into Bluetooth Ones with Raspberry Pi
    You need to check your speakers before ordering a DAC for yourself, It provides a stereo output of 30W each and requires 12-24V

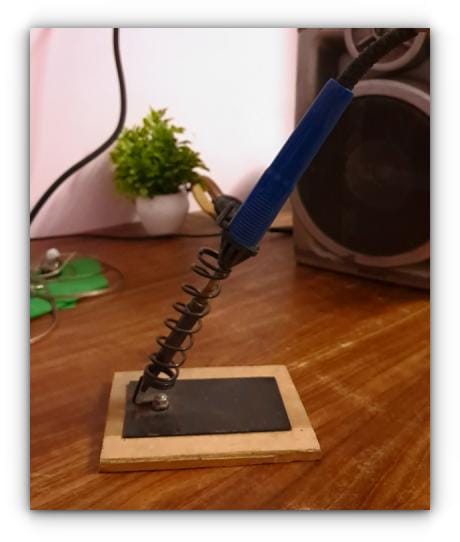
    Soldering Iron: This was my first time using a soldering iron, and let’s just say my initial attempts were far from perfect. I used it to solder the speaker wires to the DAC, which was crucial for connecting the entire system.
    How I Turned My Old Hi-Fi Speakers into Bluetooth Ones with Raspberry Pi
    Simple ol' soldering iron, nothing fancy here. It gets the job done.

    12V 2A Power Supply: To power the DAC, I used a 12V 2A adapter. Make sure your power supply matches the specifications of your DAC module for safe and efficient operation.

    3.5mm Audio Cable: This was used to connect the DAC’s audio output to the Raspberry Pi’s 3.5mm jack.

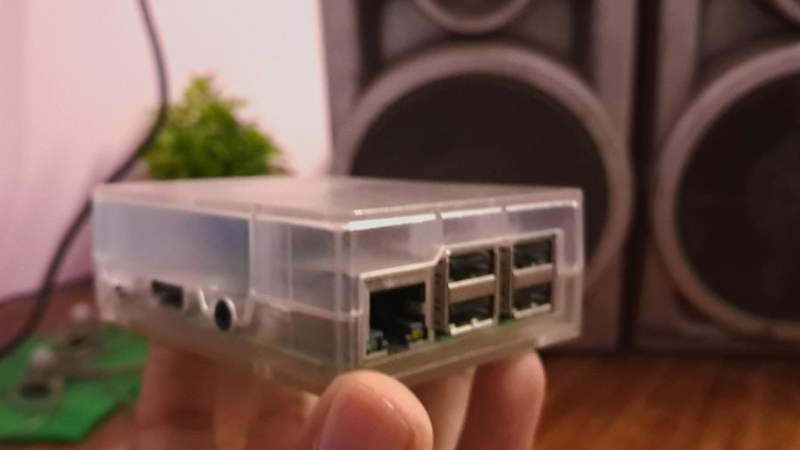
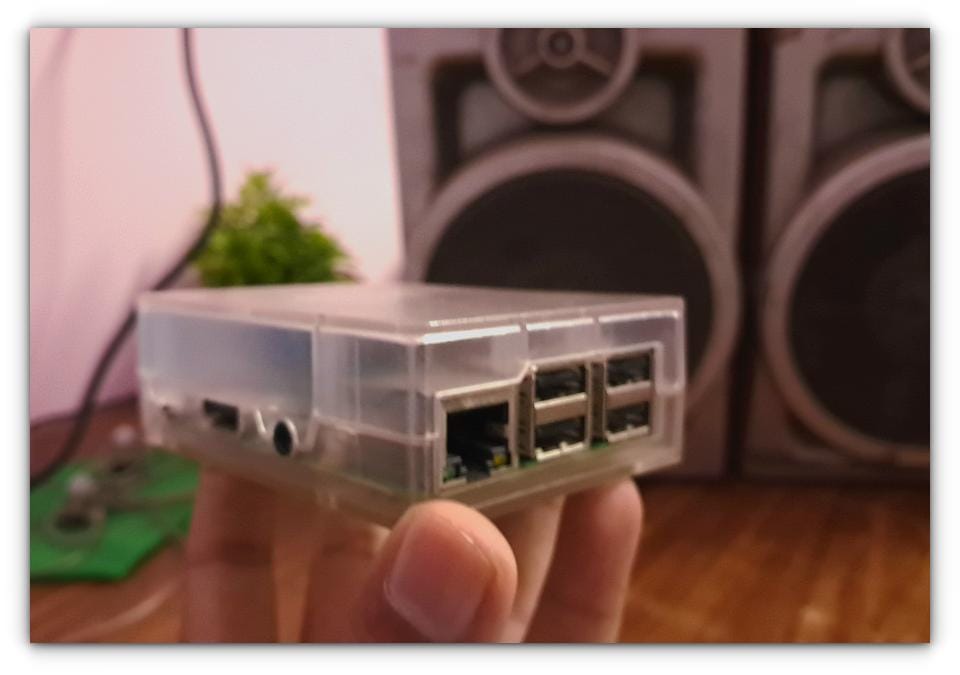
    Raspberry Pi 3: I used an old Raspberry Pi 3 that I had lying around. Any Raspberry Pi model with a 3.5mm jack will work for this project, but if you have a newer model with HDMI-only output, additional configuration may be required.

    How I Turned My Old Hi-Fi Speakers into Bluetooth Ones with Raspberry Pi
    My Raspberry Pi 3

    With these items in hand, I was ready to transform my speakers into a powerful Bluetooth system.

    If you’re planning to try or follow along this project, you should likely already have some of these components at home, making it a cost-effective way to repurpose old equipment.
    Connecting the DAC with the Speakers

    The DAC I ordered didn’t come with convenient connectors, so I had to get my hands dirty—literally.
    I rummaged through my dad’s toolbox and found an old soldering iron, which I hadn’t used before. After watching a couple of quick tutorials online, I felt brave enough to give it a shot.

    Soldering the speaker wires to the DAC wasn’t as straightforward as I had imagined. But after a few tries, and a lot of patience, I managed to secure the wires in place.

    How I Turned My Old Hi-Fi Speakers into Bluetooth Ones with Raspberry Pi
    Here's you can see my exceptional soldering skills

    Before closing the speaker lids, I decided to test the connection directly. I powered up the DAC, connected it to the speakers, and played some music through a temporary audio input.

    How I Turned My Old Hi-Fi Speakers into Bluetooth Ones with Raspberry Pi

    To my relief, sound filled the room. It wasn’t perfect yet, but it was enough to confirm that my soldering job worked.

    With the DAC connected, I was ready to move on to the next part of the build!

    Adding Bluetooth functionality with Raspberry Pi

    There are countless guides and projects for turning a Raspberry Pi into a Bluetooth receiver, but I stumbled upon a GitHub project that stood out for its simplicity. It is called Raspberry Pi Audio Receiver.

    The project had a script that automated the entire setup process, including installing all necessary dependencies. Here’s how I did it:

    Download the Installation Script

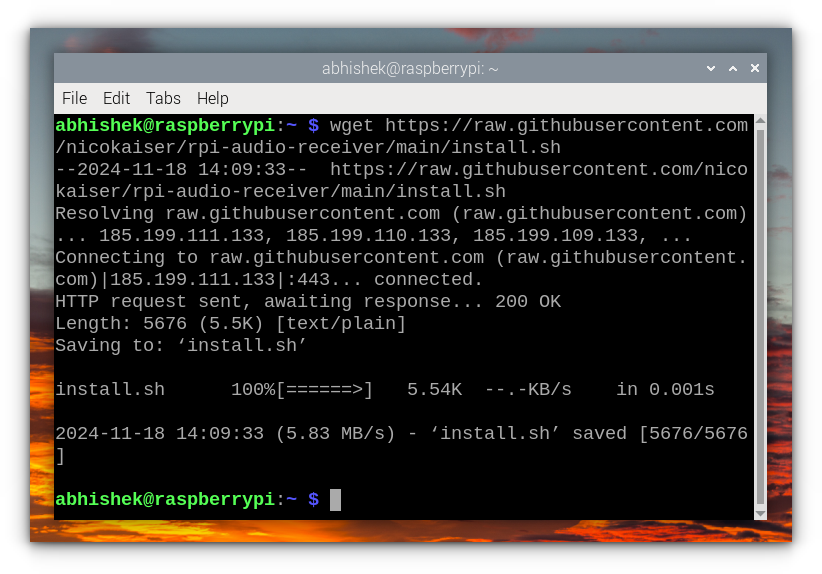
    First, I downloaded the script directly from the GitHub repository:

    wget https://raw.githubusercontent.com/nicokaiser/rpi-audio-receiver/main/install.sh
    How I Turned My Old Hi-Fi Speakers into Bluetooth Ones with Raspberry Pi

    Run the Script

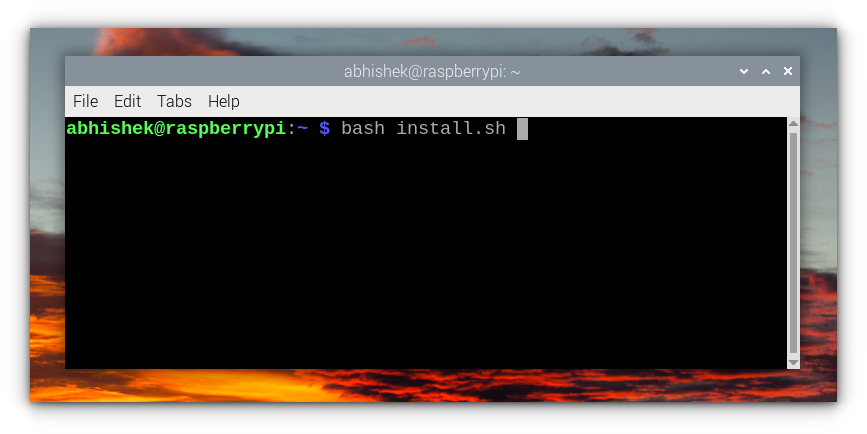
    bash install.sh
    How I Turned My Old Hi-Fi Speakers into Bluetooth Ones with Raspberry Pi

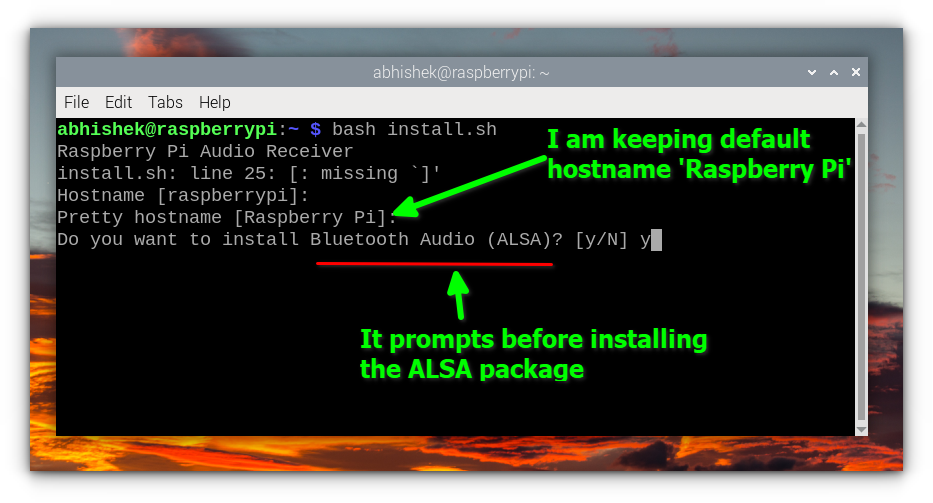
    For first-timers or DIY enthusiasts new to this, the installation screen might seem a bit overwhelming. You’ll be prompted several times to install various components and make decisions about the setup.

    Don’t worry, I’ll break down what’s happening so you can follow along with confidence.

    Hostname:
    The script lets you set up the hostname (the internal name for your Raspberry Pi) and a visible device name (referred to as the "pretty hostname").

    This visible name is what other devices will see when connecting via Bluetooth, AirPlay, or Spotify Connect. For example, you could name it something like DIY-Speakers.

    Bluetooth Configuration:
    The script installs Bluetooth-related packages and sets up an agent to accept all incoming connections.

    The Pi is configured to play audio via ALSA (Advanced Linux Sound Architecture), and a smart script disables Bluetooth discoverability whenever the Pi is connected to a device.

    How I Turned My Old Hi-Fi Speakers into Bluetooth Ones with Raspberry Pi

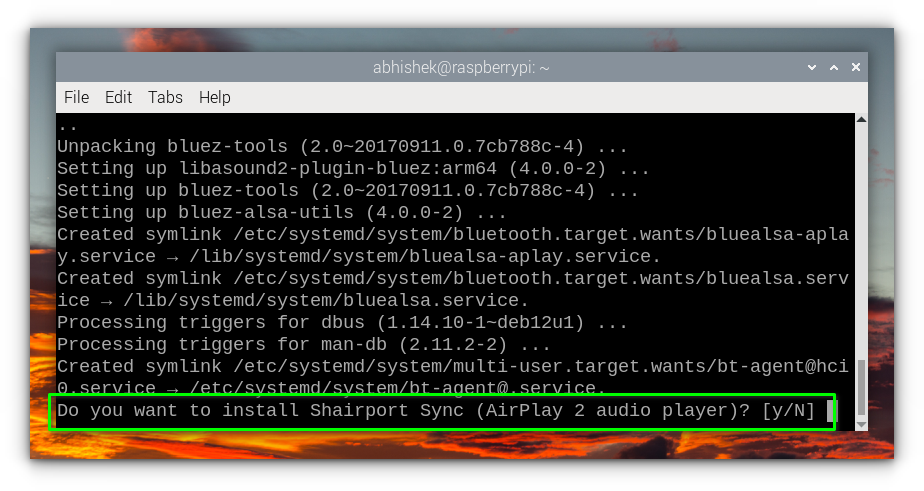
    AirPlay 2 Setup:
    This feature installs Shairport Sync, allowing the Raspberry Pi to act as an AirPlay 2 receiver. It’s perfect for Apple users who want to stream music directly from their devices.

    How I Turned My Old Hi-Fi Speakers into Bluetooth Ones with Raspberry Pi

    Spotify Connect:
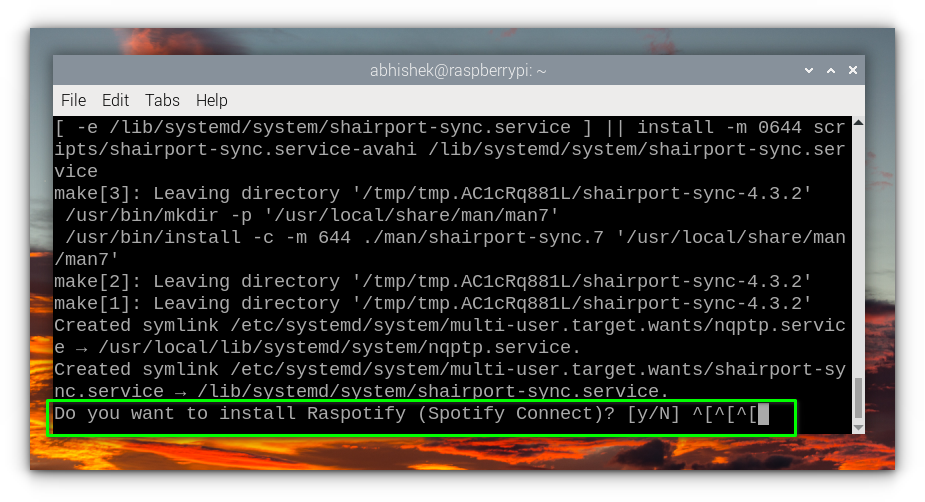
    Finally, the script installs Raspotify, an open-source Spotify client for Raspberry Pi. This enables the Raspberry Pi to act as a Spotify Connect device, letting you stream music straight from the Spotify app on your phone or computer.

    How I Turned My Old Hi-Fi Speakers into Bluetooth Ones with Raspberry Pi

    Each step is straightforward, but you’ll need to be present during the installation to approve certain steps and provide input.

    This process takes about 5 minutes to complete, but once done, your Raspberry Pi transforms into a multi-functional audio receiver, supporting Bluetooth, AirPlay 2, and Spotify Connect.

    Testing the DIY Bluetooth speakers

    With the hardware setup complete and the Raspberry Pi configured as a Bluetooth audio receiver, it was time for the moment of truth - testing the DIY speakers.

    The goal was to see how well this entire setup performed and whether all the effort I put in was worth it.

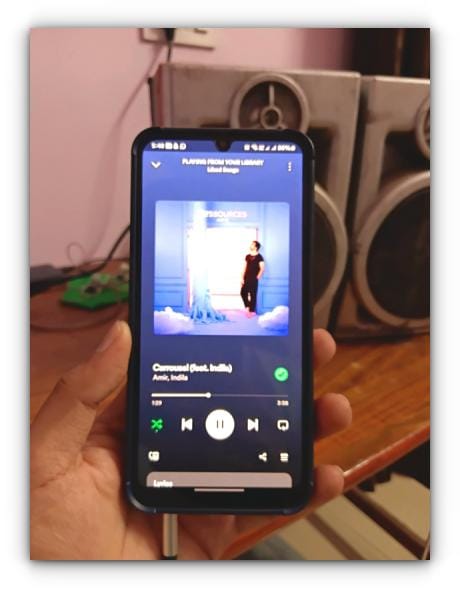
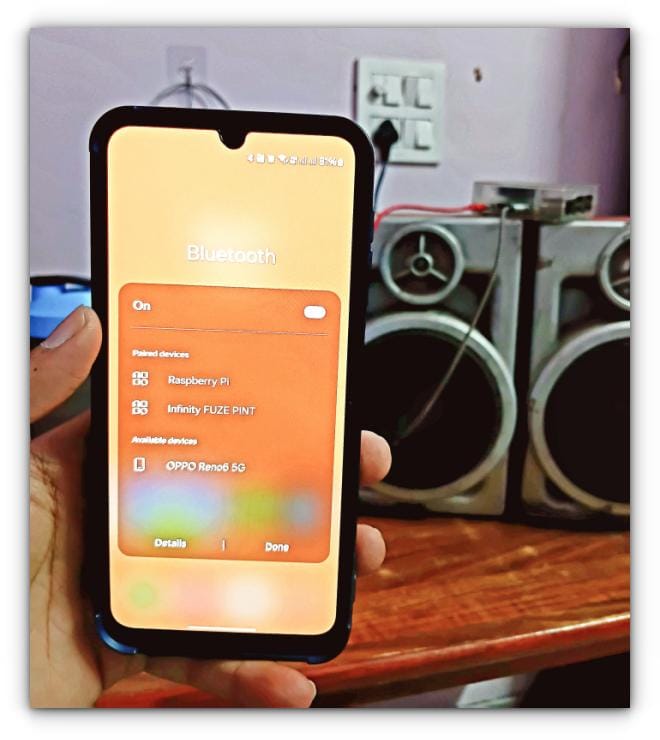
    To test the system, I decided to connect the speakers to my smartphone via Bluetooth.

    How I Turned My Old Hi-Fi Speakers into Bluetooth Ones with Raspberry Pi
    Sorry for the image quality, had to use an old phone to capture this image

    After pairing, I opened my music app and selected a random song to play. The sound flowed seamlessly through the speakers.

    I’ll admit, hearing music come out of the old hi-fi speakers felt incredibly rewarding. It was proof that all the soldering, scripting, and configuring had paid off.

    How did It perform?

    • Audio Quality: The sound quality was surprisingly good for a DIY setup. The DAC delivered clear audio with no noise, and the hi-fi speakers held up well despite being unused for a long time.
    • Bluetooth Range: The range was decent since my Pi is in this plastic enclosure, I could move around my room and still maintain a stable connection.
    • Responsiveness: There was no noticeable delay or lag in audio playback, whether I streamed music or used Spotify Connect.

    Final thoughts

    This project was a blend of frustration, curiosity, and pure DIY joy. What started as an attempt to salvage some old, forgotten hi-fi speakers turned into a rewarding learning experience.

    From figuring out how to solder for the first time (and not doing a great job) to repurposing my old Raspberry Pi 3 as a Bluetooth receiver, every step had its challenges but that’s what made it so satisfying.

    The best part? Hearing music blast through those old speakers again, knowing I brought them back to life with a bit of effort and creativity.

    It’s proof that you don’t always need to spend a fortune to enjoy modern tech; sometimes, all it takes is what you already have lying around and a willingness to tinker.

    If you’ve got old speakers collecting dust, I highly recommend giving this a shot. It’s not just about the outcome; the journey itself is worth it.

    How I Turned my Raspberry Pi into a Wi-Fi extender
    Here is how I re-purposed my Raspberry Pi to a Wi-Fi extender! A good way to spend your weekend with your Raspberry Pi.
    How I Turned My Old Hi-Fi Speakers into Bluetooth Ones with Raspberry PiIt's FOSSAbhishek Kumar
    How I Turned My Old Hi-Fi Speakers into Bluetooth Ones with Raspberry Pi

    💬 And if you did something like this in your home setup, please share it in the comments. I and other readers may get some interesting ideas for the next weekend projects.

    ❌